Tellico River
2. Bridge above Bald River to bridge below Jared's Knee(Upper Tellico, Tellico Ledges)

| Difficulty | III-IV |
| Length | 2.2 mi |
| Avg Gradient | 105 fpm |
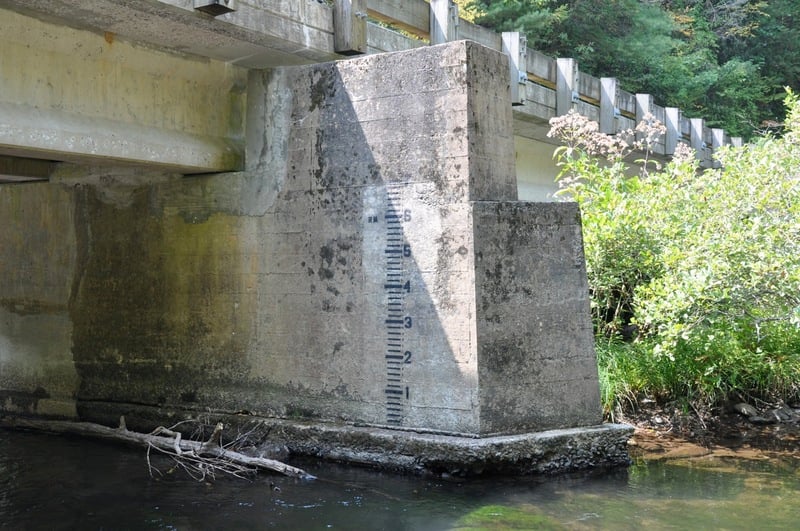
| Gauge | Tellico River at Tellico Plains, Tn |
| Flow Rate as of 2 hours | 1.70 ftlow runnable |
| Reach Info Last Updated | July 10, 2026 |
Overview
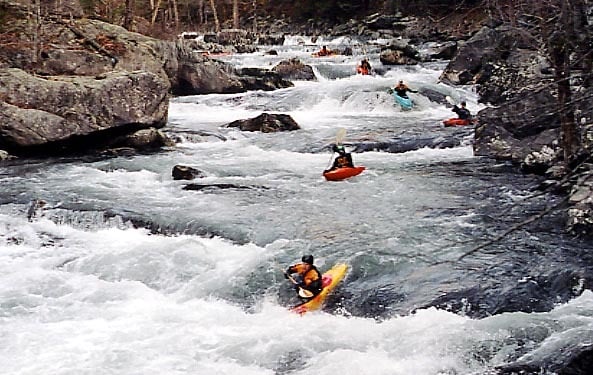
The Upper Tellico, also known as the 'Ledges' section, is only two miles in length, but the significant whitewater makes it seem longer. A parallel road makes scouting and shuttling easy and this section can be run several times in one day. The Upper Tellico has great scenery, great water, and good drops. This is classic southeastern whitewater--please don't take this gem for granted!
Description
Below the put-in, bumpy class II water brings you under the first bridge and to the First Ledge. A wide, shallow entrance series of smaller ledges sits above a river-right eddy along the bank that allows a break before the final drop of around 4 feet. The best line is slightly left of dead center, off a high point. Right of center is okay as well, but too far right or left lands on shallow rocks.
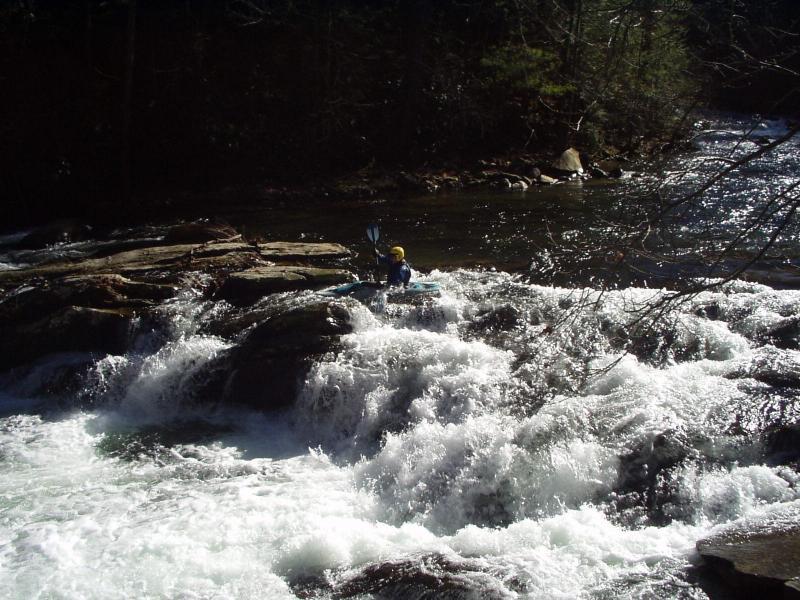
Some Class II boogie water leads to Dirty S, named for one of the ways you can choose to run this class III drop. Some more boogie with a nice small ledge leads to Middle Ledge - a six foot plunge with an autoboof in the center.
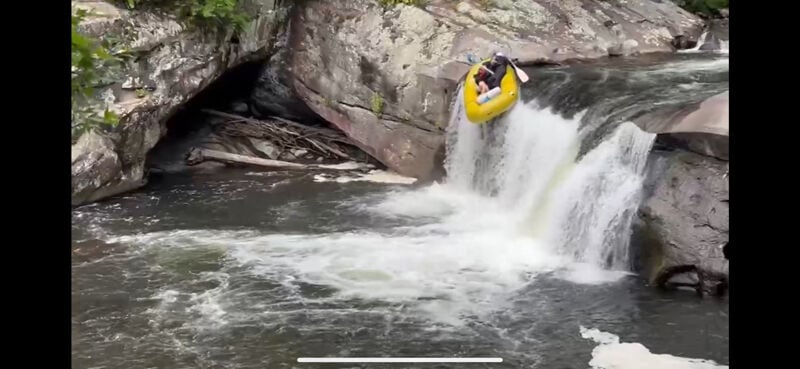
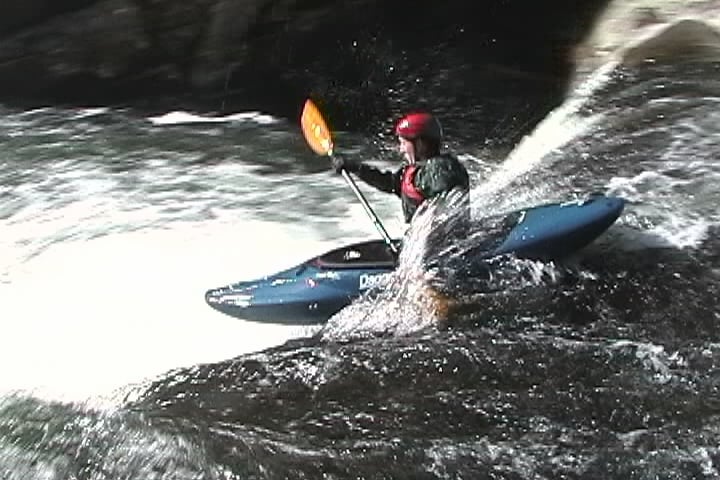
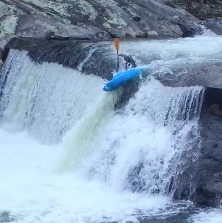
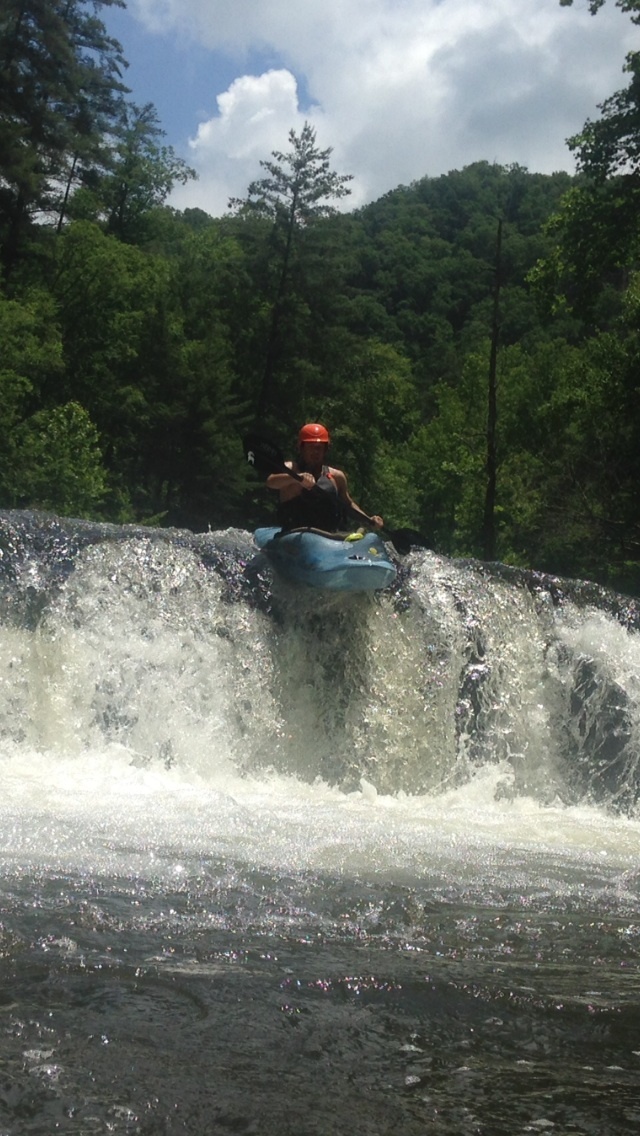
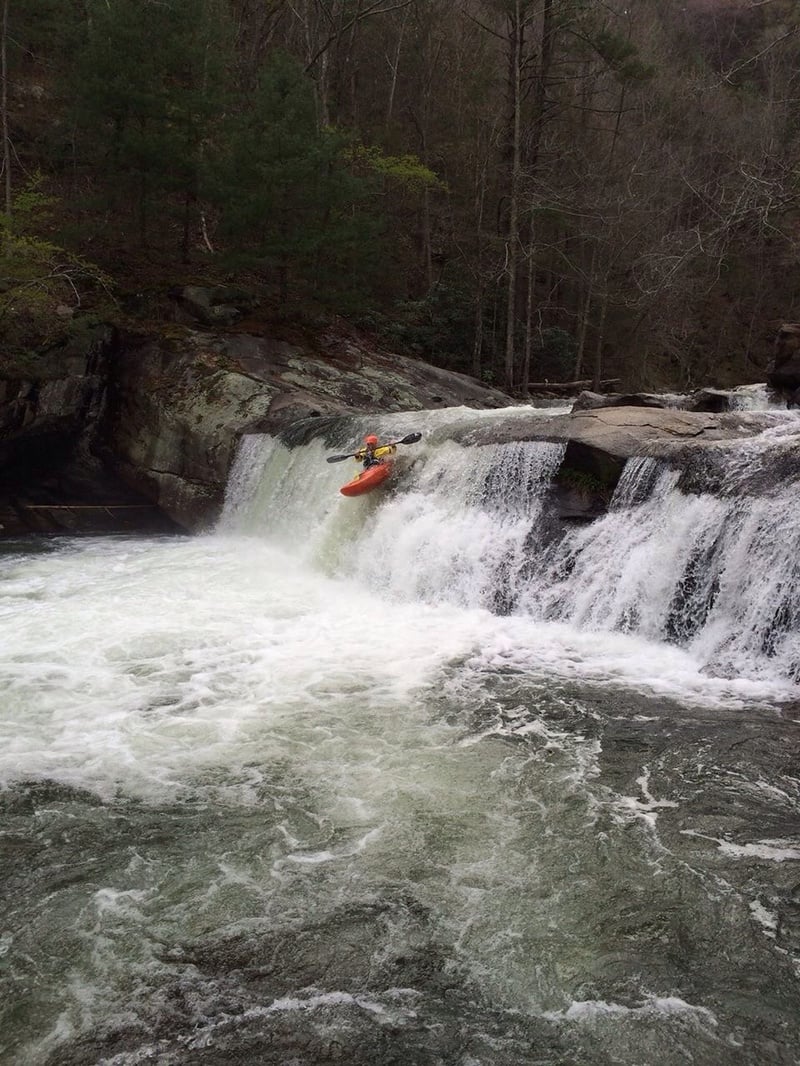
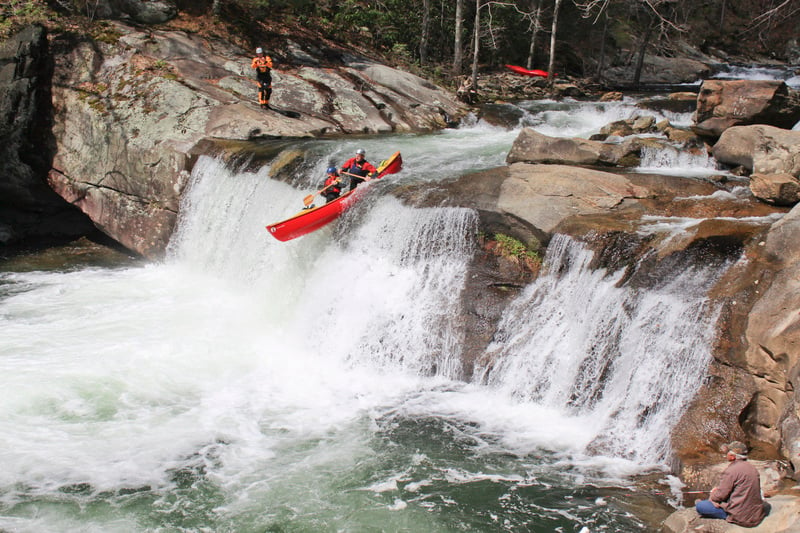
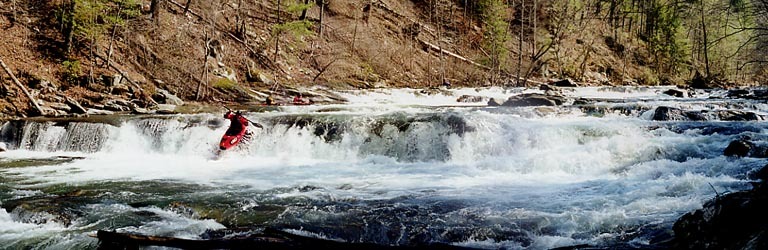
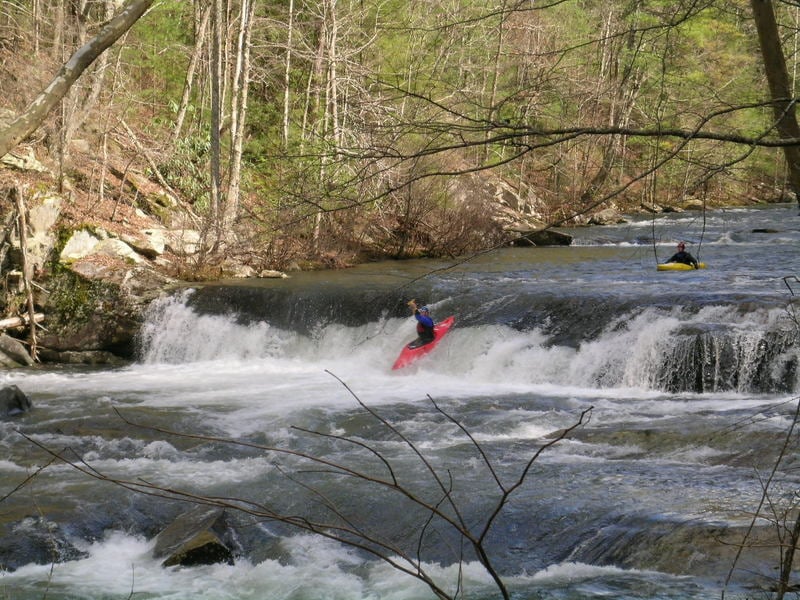
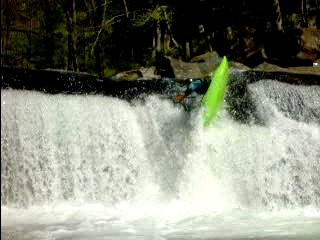
After these ledges, more shallow class II water, an island, and a sharp bend to the left brings you to Cry Baby. Run right to center, hugging a river-left shelf, down this abusive slide, and eddy out either side above Baby Falls. Baby Falls is a fantastic, clean, 10 foot ledge that is one of the best drops in the southeast for honing your boof technique. The far left, coming from the right, sports the classic righty-fader the drop is famous for. The far right provides a late boof-to-stomp option with a bit of a green landing - make sure to spot it! The entire middle of the drop can be a bit sticky, even on the low side of good, so paddle with intention! Scouting from above on the right is great for line up and details, photos and portaging are best on the left. Laps are easy enough via a steep and careful hike up from the eddy below on river-left.
From the pool below Baby Fa
...Just upstream of the bridge over the Tellico on the right is a single-car pull off, immediately followed by a small parking area. Please park 'head-in' in this parking area and make room for as many vehicles as possible. Turning around here by pulling out into the road has led to many accidents, so pay attention!
Below the first bridge run center to right over a small double drop, which forms the entrance to First Ledge. First Ledge can be run left of center or right of center. Far right or left should be avoided.
NOTE! Over 2.3 feet, First Ledge develops a terminal hydraulic, guarded by the downstream rocks on the right; it was the site of a high-water fatality on Jan. 1, 2011.
Either run the right side of the left flow for a stair stepping drop, or a tight slot just right of this for the Dirty S namesake move.
Run the left side of the main center veil for the most straight-forward autoboof, or go for the late, leaning deep right stroke off the right side of the main ledge.
Here a bedrock shelf sticks out of the water and splits the flow. Hug the right or left side of it depending on your taste, and eddy out below above Baby Falls.
Scout right or left, portage or hike laps river-left next to the busy road. Classic line is boofing the left side with a right stroke, or try the taller, greener ledge pop on the right with a lefty (just make sure to spot your landing for a softer hit).
Just below Baby Falls is Diaper Wiper. Far left is running sliding down to a corner, where a quick eddy or a hard right angle will keep paddlers off the nasty rocks and back to middle. The middle line is doable if you're far enough right but the bedrock tilts back left. The right line is run falling sideways off a small ledge onto a slide.
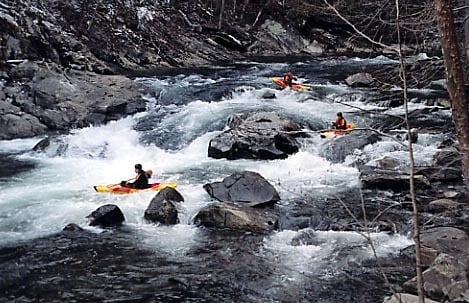
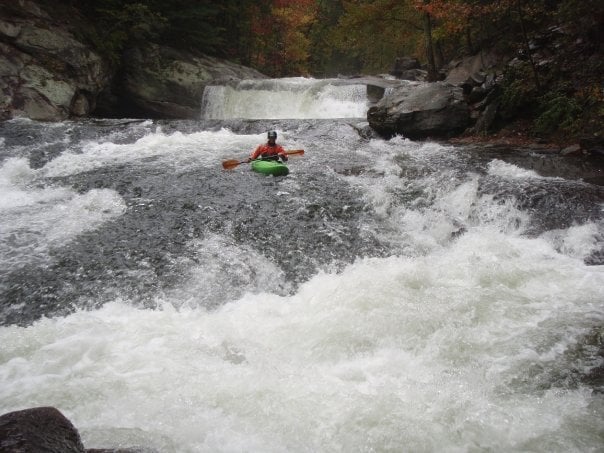
There are three distinct rapids at normal flows with the actual Jared's Knee rapid making up the fourth. At higher flows, these three rapids become one big rapid, so make sure you know where you are. At the bottom of Jared's Knee there is a pin rock on river left; use caution here. 100 yards downstream take out on the left shortly above a bridge.
A nice parking area just upstream of a bridge over the river. Park head in and make room for other users at this busy spot. Stay out of the road when parking, loading, changing, etc!
Aug 1, 2025
NOTE: Adventurous and some light portaging.
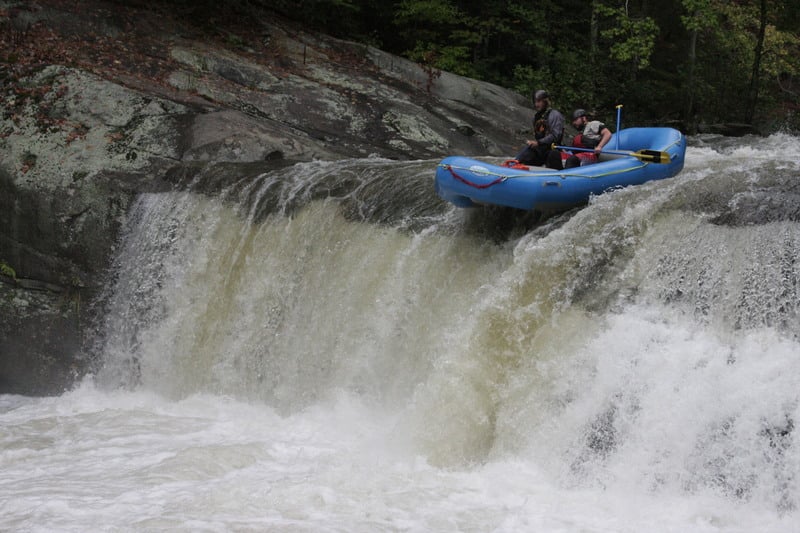
We took a 10' 5' RMR Storm Raft and 2 AIRE Tributary Spuds down the 7-8 mile stretch starting from above the bridge that is upstream of the 6' ledge and ending past the junction on river right.
All taller ledges were able to be run in both the raft and spuds, Baby Falls was runnable and lappable at this flow. Great for spending time hucking multiple times.
Directly below Baby Falls was shallow, but navigable on the river right side in both raft and spud. Jared's Knee was navigable in both raft and spud, with small short moments of being stuck.
This flow definitely runs with the right technical rafting skill and the willingness to get out from time to time to push off of a few rocks here and there - not everyone's idea of a good time, but we will be back for it again!
May 21, 2018
Left side boof on Baby Falls